You can reorder elements by changing the elements' weights or by dragging them into place.
How to Reorder Page Elements
There are 3 methods you can use to rearrange page elements, depending on the situation or page structure: using the expanded Editor Interface, using the Drag and Drop tool, or using weights.
The standard Editor Interface when you edit a page contains a cross icon beside all page elements, as well as items within composite elements like accordions. This is the default tool to reorder elements in the Edit tab.
- Edit an existing page
- Ensure Show Row Weights is visible on the top right above Page Elements.
- If Hide Row Weights is showing, select that.
- Look for the small cross on the left of the element you wish to move.
- Click and as you hold, drag the element to its desired location.
- Save.
For longer and more complex pages, you can use the "Drag and Drop" mode to see a very collapsed view of all page elements than you can easily reorder.
- Edit an existing page.
- Click on the three dots on the right-hand side of Page Elements element.
- Choose Drag & Drop.
- In the collapsed view of page elements, drag and drop into the order you desire.
- When you are done, click on Complete drag and drop (Important: Clicking Save will not reorder the content)
- You will go back to the editing screen and should see the elements in the order you selected
- Save.
- Edit an existing page.
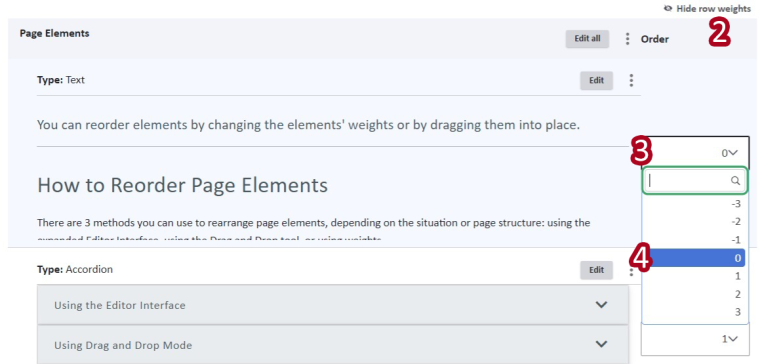
- Select Show row weights on the top right above Page Elements.
- Click the dropdown next to the number of the element you wish to move.
- Select the appropriate number.
- The higher the number the lower in the page it will appear.
- Save.
Image